When you invite an extra user to your Kontolink account, you have the option
of assigning the user one or more tasks.
When the user accepts the invitation to Kontolink, a to-do list will then be displayed with the selected tasks.
Invite user
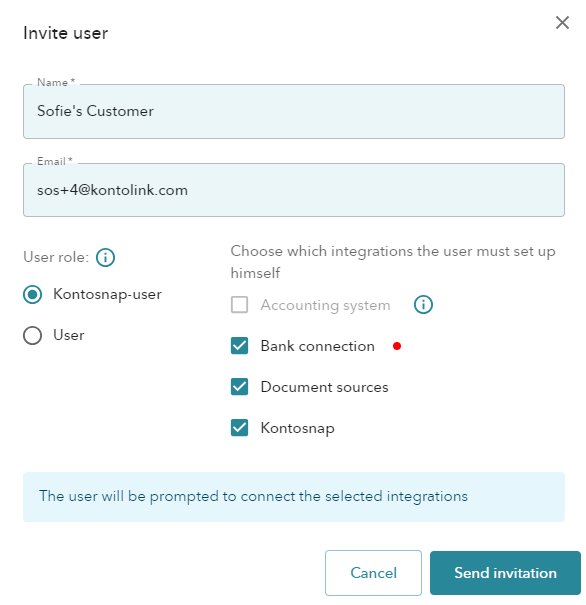
When you invite an user to Kontolink, you must choose the user role and which integrations the user should set up in Kontolink.
Invite user
1. Inset name and email on the new user.
2. Choose the type of user role and which integrations should be on the to-do list.
3. Click “Send invitation”.
The invitation has been sent!🎉
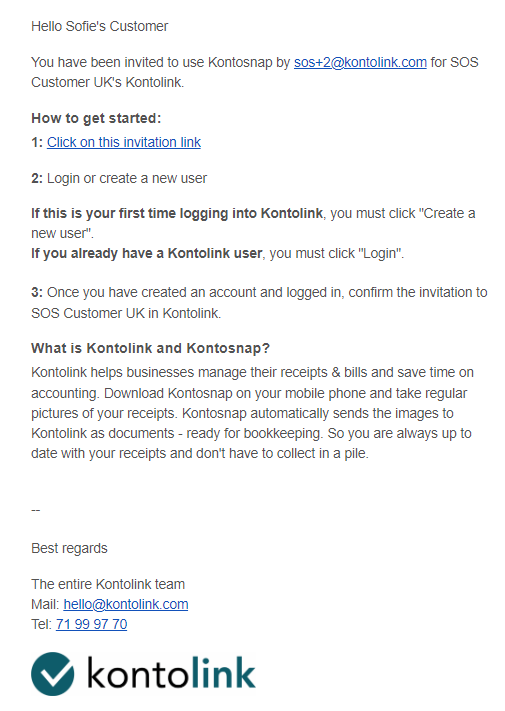
1. The user receives an email, with an invitation from Kontolink.
2. The user has to click on the invitation link.
3. The user will be guided through the setup of Kontolink.
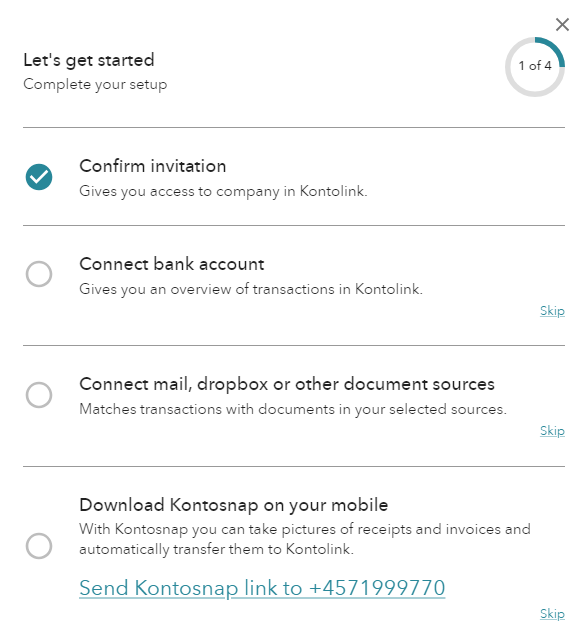
The to-do list of assigned task
1. Signed up and accepted the invitation.
2. The to-do list will appear →
3. The integrations will be shown in Kontolink, once the user has connected these.
It is also possible to accept the invitation directly from the mobile.
Here’s how a Kontosnap-user gets started:
Do you need help?
We’re always happy to help, so feel free to contact us on our chat, mail or phone 😊
- hello@kontolink.com
- +45 7199 9770